I have always wanted a wishing well in my yard but it was always lower on the priority list than some of my other projects. Well, I volunteered to create the class project for my daughter's school auction and in trying to come up with an idea for what to build, I thought of a wishing well. It's the perfect yard decor, and by building one for the school auction, I could build one for myself at the same time! ;-)
Here are the abbreviated instructions for how I built my magical wishing well, for full instructions and downloadable plans, please visit my blog via the link at the bottom of this post.
First, I cut the 2x6 boards to side with each end mitered at 30 degrees. I then glued the boards together to form 6 panels of four boards each.

Next I cut 2x4 boards to size and attached them to the 2x6 panels.
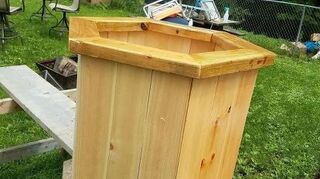
I attached all the panels together to form the hexagon-shaped bottom of the well.
Next I cut and attached the two 2x4 boards to create the sides of the well.
I next cut and attached two 2x4 boards to opposite sides of the well base.
Then, I began framing the roof. I cut the 6 1x4 boards that form the horizontal boards of the roof frame. I also cut the 6 1x4 boards that form the roof trusses. I attached all boards to form the frame for the roof.
Next, I cut the 1x6 boards to create the panels for the roof. Each board was beveled and mitered at the necessary angles. I also cut and attached the round wood closet rod I had purchased to hang the bucket from, and to create the handle for the well.
Lastly, I sanded the wishing well and applied a coat of Thompson's Timber Oil Water Sealant in a Walnut color. I attached some rope and wrapped it around the well post and then hung a stainless steel bucket.
This took 2 weekends to build, the most difficult part was the roof and trying to make sure all the roof panel boards lined up properly.
Original article and pictures take https://www.hometalk.com/35318039/diy-wishing-well site
Комментариев нет:
Отправить комментарий